

how to remove chalk paint
While chalk paint can look beautiful when done correctly, sometimes, it just isn't the look you're going for. Luckily, you don't have to put up with chalk paint if you don't want to! Removing it isn't always easy, but it definitely isn't impossible, either.
If you're in the market to remove some chalk paint from your furniture piece or whatnot, at That Sweet Tea Life we're here to help!. Below, you'll find step-by-step instructions on how to remove chalk paint on your own, as well as how to remove it from your paint brushes. Together, you won't have to worry about dealing with this stubborn type of paint ever again.
Chalk Paint and Its Uses
Let's start with what chalk paint is in the first place. Chalk paint is a type of paint that is primarily utilized on furniture pieces to create an aged, chalky looky.
Typically this will create white streaks across the paint, making for an antique, well-loved look–even if the piece of furniture was just made last year. Right now, chalk paint is the embodiment of the shabby chic look.
People love the look of chalk paint for distressing projects of all kinds. While it can be difficult to remove, applying it is a fun process that results in an appearance that's difficult to achieve with any other type of paint. Instead of collecting complicated tools to create an aged look with regular paint, you can let chalk paint handle it all. No sanding required.
Chalk paint is also popular because of its ability to be painted over other surfaces. Chalk paint can be applied directly over clean surfaces that may or may not have already been painted. While you can't add chalk paint over metal, it goes beautifully over types of woods and other flat surfaces. No matter what you want to age, you can do so easily through the use of chalk paint.
Applying Chalk Paint
Again, applying chalk paint is one of the easiest aspects of it all. Chalk paint does not require extra materials other than a chip brush and your piece of furniture.
Before you start to paint, make sure you've cleaned your piece of furniture off thoroughly. Once you've done this, you're ready for the actual painting process. Since this article is more so focused on removing chalk paint, we'll go through this quickly. For more in-depth instructions, check out this article.
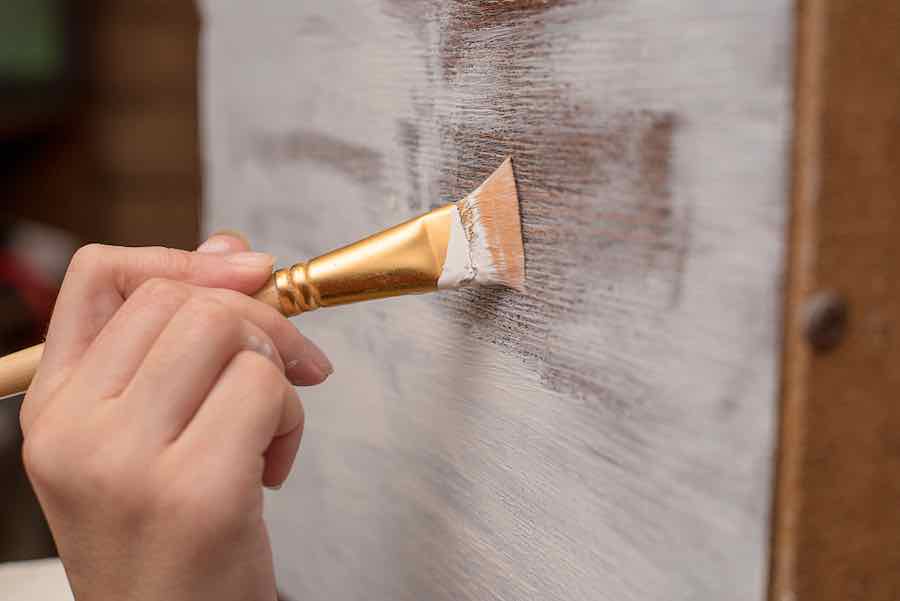
Now, take your paint brush and dip it in your chalk paint. Now, just run it back and forth over your furniture until you achieve the look you desire. This is the wonderful thing about chalk paint: you don't have to worry about being precise. The messier the look, in fact, the better. This tends to look much more authentic than if you went over it extra carefully. Instead, just have fun with it!
If you want to create an even more distressed look, you can choose to use some sandpaper and sand down your piece of furniture after painting. This will spread the paint more, make it look more aged, and overall just give it a great vintage feel.
How to Remove Chalk Paint
Now that you know why chalk paint is used and even how to apply it, it's time to learn how to carefully remove your chalk paint.
Removing chalk paint isn't as easy as removing other paint, and painting directly over it is simply not an option. Instead, you must follow these three steps to not only preserve your furniture piece, but get rid of the paint with ease, too. Here is what you'll need.
Tools:
- Sponge
- Water
- Sander
- Sandpaper
- White Spirit
- Steel Wool
- Bucket/Hose
- Cloth (Lint-Free)
- Danish Oil
- Wax
Step 1.
To remove the bulk of the paint, you need to have your hose on or some buckets of water. We suggest using a hose as the continuous amount of water will be incredibly helpful for getting rid of the chalk paint.
Start by turning on your hose and getting the piece of the furniture wet. Take your sponge and scrub at one spot while having the hose soak it in water; this will help the paint come off easier. Scrub the area using both water and white spirit. The white spirit is a wonderful cleaning solvent that will make the paint practically disintegrate, especially when scrubbed.
As you use the sponge, make sure you don't forget to clean it off, too. Cleaning the furniture with a chalk-paint-soaked sponge does no one any good, and it will only make the paint go right back onto the furniture–exactly what you didn't want. So, take the time to wash the sponge off with your hose in between scrubs.
Also, make sure the water you're using isn't too hot nor too cold. You want to aim for a room temperature level, as the other extremes may cause warping or damage to your piece of furniture.
Step 2.
After you've removed the chalk paint that you can from your furniture with a sponge, it is time to switch to a piece of steel wool. Steel wool is much tougher than sponges and can remove even the toughest smudges of chalk paint, especially when paired with water.
After all of the paint has been removed, it's time to leave the piece out to dry. Leaving it outside is wonderful, as the natural heat from the sun will air dry the piece effortlessly. Just make sure it's not over 100 degrees outside!
Now that the paint is gone, it's time to sand down the piece and get it looking like itself again. Using your sander and sandpaper, go over your furniture on every corner and every edge, smoothing down the surface as much as possible.
Take your time here, really working with the machine to provide even, smooth strokes. Make sure you follow the direction of the wood grains; this will result in the best, most natural look possible.
Step 3.
After the sanding process, you're almost finished. The only thing that's left is to finish off the piece of furniture using some type of oil. We suggest using Watco 65551 Danish Oil, as it is specifically meant for furniture pieces.
Before applying oil, cover your furniture in white spirit one more time. It should be completely covered. Then, let it dry on its own. Once it dries, it's time for your Danish oil. Using your lint-free cloth, apply drops of oil onto the furniture and rub it in entirely.
Do this over every inch of the piece of the furniture; this may feel time consuming, but it results in a beautifully glossy piece. The amount of coats you add is up to you and how you want the piece to look, but typically, three coats are going to be ideal–just make sure you wait a few hours in between coats.
Finally, it's time to finish up your piece of furniture. The chalk paint has been removed and it is looking glossier than ever. So, add a glob of wax and apply it all over the furniture as a finishing substance. Now, you're left with a completely different piece of furniture than what you started with. How incredible is that?

Removing Chalk Paint from Paintbrush
Before you finish up your chalk paint removal adventure, make sure the paint brushes you used to paint your furniture piece isn't coated in chalk paint, either. This can actually ruin your paint brush entirely, you want to make sure you know how to clean them properly if this does happen.
Start by soaking the paint brushes in warm water and leaving it overnight. The bristles should be completely submerged. The next day, grab your paint brushes and start separating the bristles by hand. Doing this will ensure that your bristles aren't damaged but also aren't stuck together, ruining the strokes. Then, squeeze the bristles into your palm and ring the water out.
Finally, apply a small dab of detergent soap to the tip of your brushes and rub. This will totally clean out the brush, guaranteeing that the chalk paint is nowhere to be found. Rise out the soap thoroughly, let the brushes dry, and you're totally ready for your next painting project.
Getting Rid of Your Chalk Paint
With these tips and tricks, removing your chalk paint doesn't have to be a whole ordeal. In fact, you can turn it into a project that is just as fun as painting it in the first place.
While chalk paint may be a good look for some, getting rid of it can be incredibly satisfying. No matter what kind of furniture piece you're transforming, removing chalk paint can be a totally new experience.
how to remove chalk paint
Source: https://www.thatsweettealife.com/how-to-remove-chalk-paint/
Posted by: martinezishaves.blogspot.com
0 Response to "how to remove chalk paint"
Post a Comment